KMBOX Network Edition (Net) setup
Before using the SkyAim Pro aimbot with a KMBOX Net, connect the box correctly. It is controlled over the network: the box shows its IP, port and UUID on its screen, the radar PC needs an address in the same range, and SkyAim Pro connects with those three values.
1. Connect the hardware#
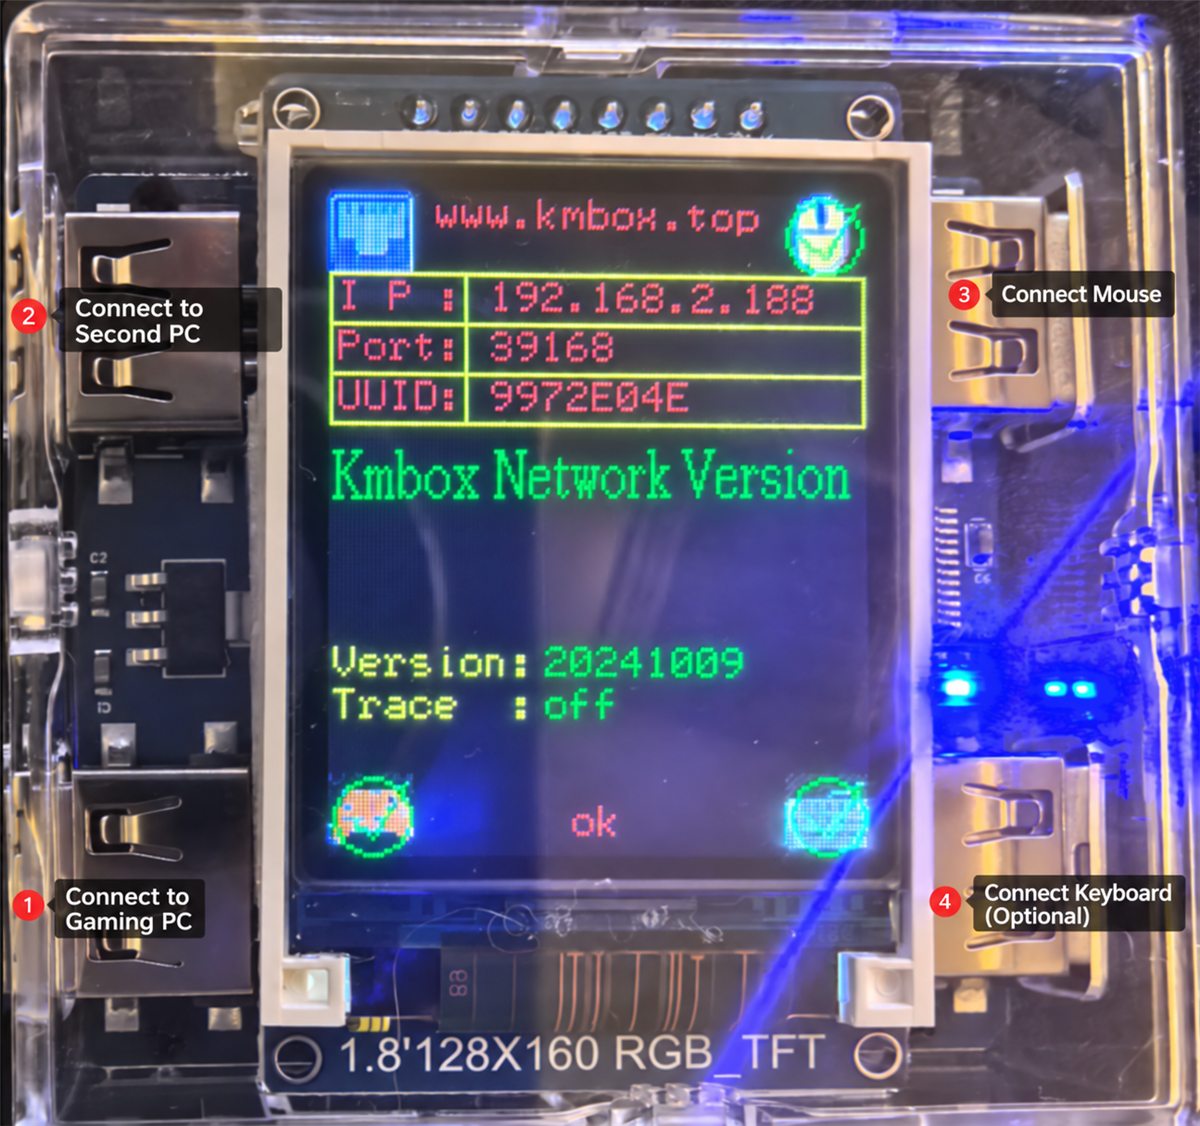
Connect one cable from the top-left KMBOX port to the radar PC (the secondary PC running SkyAim Pro), then another cable from the bottom-left port to the game PC. Mouse on the top-right port, keyboard (optional) on the bottom-right.
2. Install the KMBOX driver#
On the radar PC, run the WCH USB network driver installer that came with the box and click Install. Restart the radar PC when it finishes; a new network adapter appears after the restart.
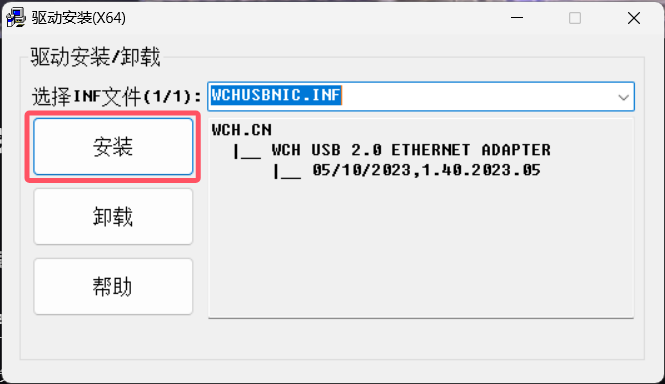
Try another USB port (directly on the motherboard, not a hub) and run the installer as administrator. If it still fails, the box or its cable is at fault; contact the device seller.
3. Configure the network adapter#
- Open the adapter list
Press Win, open Control Panel → Network and Internet → Network and Sharing Center → Change adapter settings.
- Find the KMBOX Net adapter
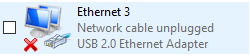
Look for the USB2.0-style adapter. If you cannot find it, unplug and reconnect the box and watch which adapter disappears and comes back.
- Open IPv4 properties
Right-click the adapter → Properties → select Internet Protocol Version 4 (TCP/IPv4) → Properties.
- Apply the address
Choose Use the following IP address: IP address
192.168.2.100, subnet mask255.255.255.0, gateway and DNS empty. Click OK.
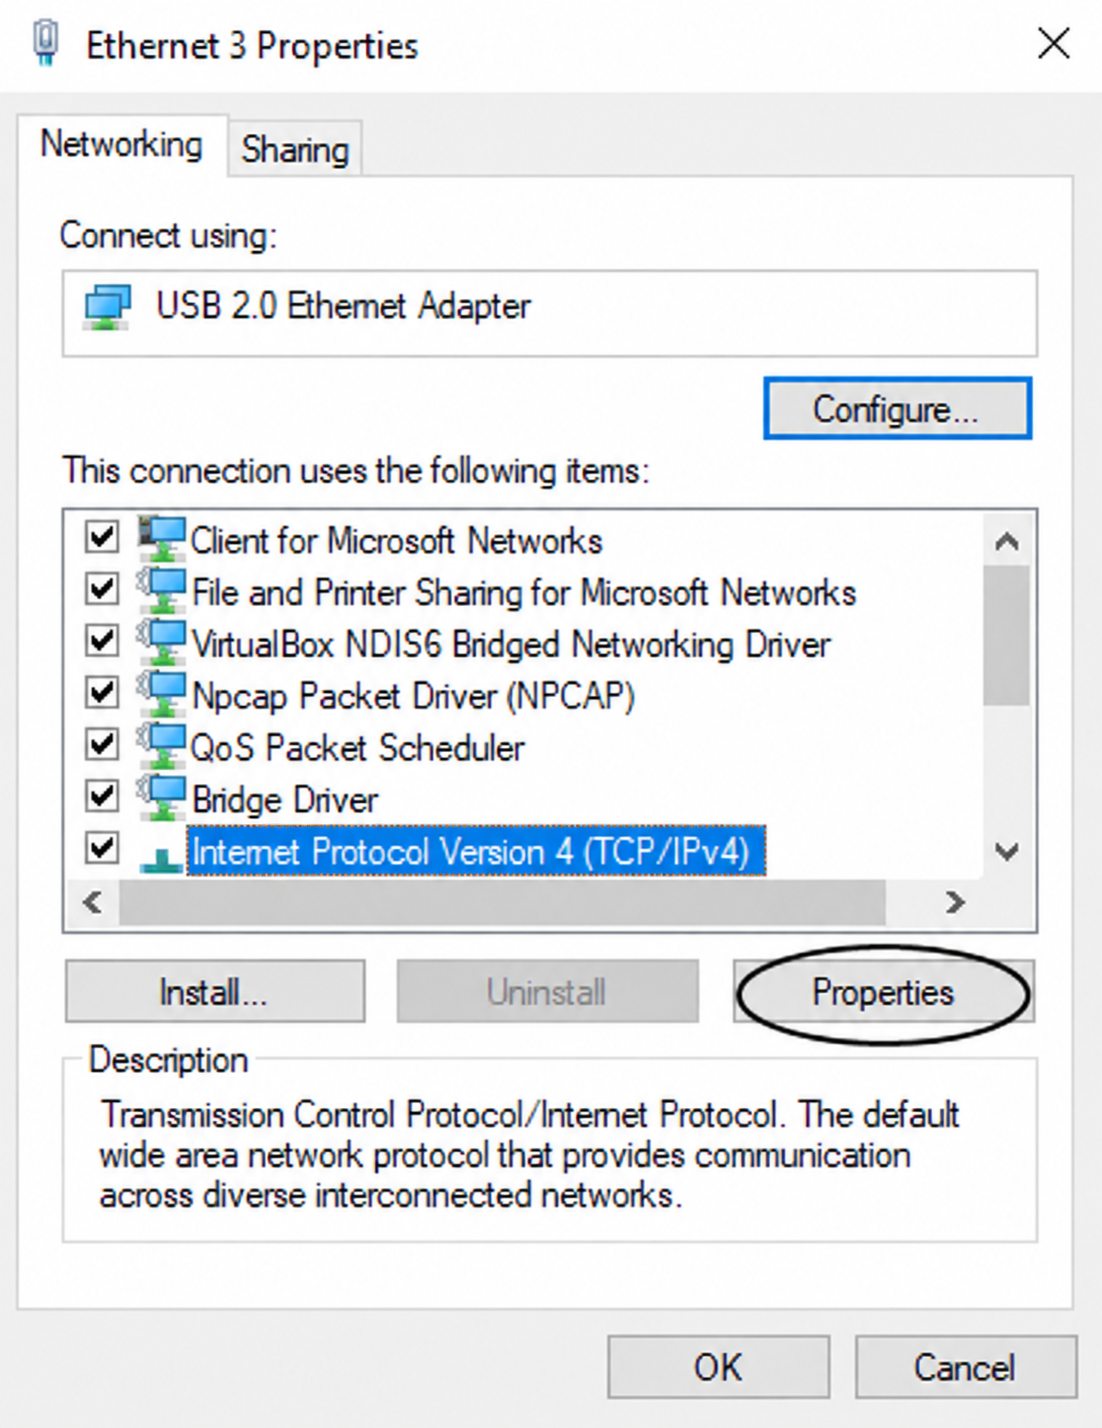
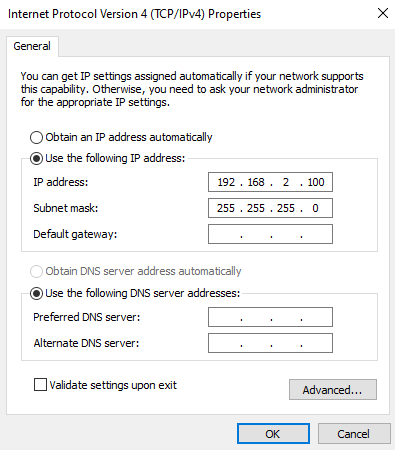
The IP on the box's screen decides the range. If your box shows 192.168.5.x, give the PC 192.168.5.100. The third number must match, the last must differ.
4. Test the software connection#
- Aimbot section → Device
Ctrl 6, tick Use KMBox NET.
- Enter the address
Type the IP, Port and MAC / UUID exactly as shown on the box's screen (the UUID is the eight hex characters).
- Connect
Click Connect. The Firmware line fills with the box's signature and the console prints connected and verified.
Restart both PCs and try again. If it still fails, check the table below and then contact the publisher with the console lines.
If it does not connect#
| Message | Cause | Fix |
|---|---|---|
| KMBox NET response timed out | The radar PC cannot reach the box. | Check the fixed IP is in the box's range, the USB network adapter is up, and the Windows firewall allows SkyAim Pro. |
| Connected, but Mouse test moves nothing | The game-PC cable is in the wrong port, or the UUID is wrong. | Move the cable to the bottom-left port; re-type the UUID from the screen. |
| Works, then stops after a while | Windows put the USB adapter to sleep. | Device Manager → the adapter → Power Management → untick Allow the computer to turn off this device. |
Verify and calibrate in SkyAim Pro#
- Mouse test
In the Aimbot section click Mouse test. The cursor on the game PC draws a small square. Nothing else works until this does.
- Connect on startup
Tick it so the device is opened every time SkyAim Pro starts.
- Calibration (this PC)
Run it once after the first successful Mouse test, and again after you change mouse DPI or in-game sensitivity (unless Use the game's sensitivity settings is on). It is stored per PC, not per profile. Until you do, the status reads Not calibrated: using the default gains.
- Aim button
The device reports its own button presses, so the Aim button (Mouse 4 or Mouse 5 are the usual) is detected even though the mouse is physically on the game PC. Keyboard hotkeys (Toggle aimbot, Engage aimbot) are optional extras.
Now tune the aim itself: Device aimbot reference.
Check the FAQ and the launcher message list first. If that does not solve it, send the publisher your newest file from output\Logs (or launcher-update.log for launcher problems).